
Snap-on Precision Torque Application

|
Team members required: |
2 |
|
Description: |
This event will assess participants' skills in three key areas related to fasteners: identification, assembly, and torque application. It will challenge teams to demonstrate their knowledge and proficiency in correctly identifying various types of fasteners, efficiently assembling components using those fasteners, and accurately applying the proper torque specifications for secure and reliable connections |
|
References: |
AC 43.13-1B, Section 3 Bolts |
|
Tools and equipment list: |
https://b2b.snapon.com/productDetails/954783/2/888278
|
|
Instructions: |
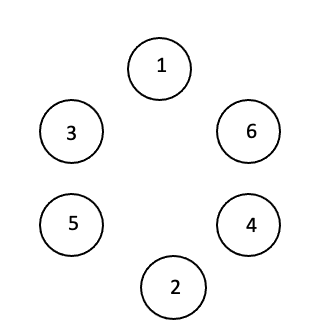
b. Assemble (1) of each of the bolts, two (2) washers and nuts in each of the circular holes
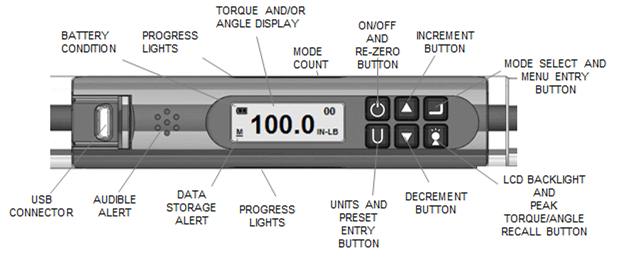
3. Verify proper torque on torque instrument
Note: Do not turn on wrench while torque is applied, otherwise torque zero offset will be incorrect and wrench will indicate a torque reading when torque is released. If this occurs, re-zero wrench by momentarily pressing POWER button while wrench is on a stable surface with no torque applied.
4. Torque Fasteners to 20 lb-ft and in a star pattern as specified
TORQUE MODE
PROGRESS LIGHTS Yellow - First light indicates 40% of target torque or angle reached. Second indicates 60% of target reached. Green - Indicates target torque or angle reached. Red - Indicates exceeded torque or angle target plus $% or exceeded maximum preset target. 5. NOTIFY THE JUDGES UPON COMPLETION OF THE ASSIGNMENT. |
|
Scoring: |
Scores will be calculated according to the AMC score sheet. Additional penalties may be assessed for improper assembly of a fastener, improper inputting of torque settings into the torque instrument, and/or application of torque to fastener. |

 WRENCH POWER ON SEQUENCE
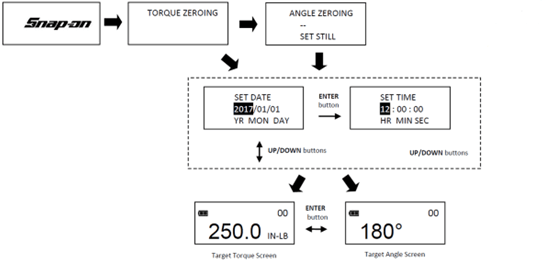

For More Information: